Dungeon changes and boss strategy guide
Learn round and starting gauge rules, key boss mechanics, and how to counter them.
Dungeon progression and round rules
From regular waves to the boss
Dungeons are being reworked so that you face regular MonMon waves before challenging the boss. Skill gauges are prepared again according to each round's starting rules, and effects that counter the boss's mechanics become important.
Four dungeons open through Stage 20
Canyon of Wind, Undead Castle, Ice Fortress, and Insect Queen's Hive will be available through Stage 20 in this update. Stages 21–25 are planned for a later release.
Starting gauges are recalculated each round
Remaining skill gauges reset when a round ends. Even if you built up a large gauge in the previous round, it will not carry over.
In the next round, starting gauges are set using the fastest living MonMon on either side as the reference. Faster MonMon start with fuller gauges.
For example, with a 60% starting reference, the fastest MonMon starts at 60%. A MonMon with half its Speed starts at 30%.
- In regular PvE, including dungeons, and in the Tamers League, the fastest MonMon's gauge is prepared to 60%; other MonMon receive a proportionate amount based on Speed.
- The main field and Field Challenge use the same method with a 75% reference.
- Lordrake and Ice Fortress boss rounds are exceptions and start with gauges at 0.
These starting gauge ratios are the currently planned values.
Build teams around each mechanic
The in-game Boss Guide also lets you check the effects you need and find owned MonMon with those effects to add to your team.
Dungeons — detailed boss strategies
Select a boss icon to see its detailed strategy guide.
White Crystal Island — managing Hunting Marks
Use buffs on allies to prevent Hunting Marks and reduce existing marks.
01 · Key mechanics
Key mechanic: At the start of battle and before the boss uses a skill, allies without buffs receive a Hunting Mark. When a marked ally receives a buff, 1 mark is removed.
Why is it dangerous? Each mark increases damage taken from the boss and Wolpy by 50%, and allies with more marks are prioritized as targets. The boss's Beast King's Fury deals extra damage to marked allies and gives the boss 10% Skill Energy for each marked ally. Leaving marks unchecked concentrates attacks on one MonMon and brings the boss's next skill sooner.
Another threat: Wolpy removes buffs from allies. An ally who loses their buffs can become vulnerable to marks again, so both reducing marks and maintaining buffs are important.
02 · Strategy
Keep buffs on allies to prevent Hunting Marks. If marks are already present, reapply buffs to allies with the most marks first. Receiving a buff removes 1 mark, so a single buff application will not clear multiple marks at once.
Use area attacks to take out Wolpy as well, reducing the chance of losing your buffs. Check marks and allied HP before the boss's next skill to prepare for focused attacks and extra damage.
03 · Useful skill effects
Buff application: Prevents Hunting Marks and reduces marks already applied. MonMon that buff multiple allies are particularly effective.
Green Crystal Island — limiting healing and Lifesteal
Use Healing Decrease to reduce the boss's healing and Lifesteal.
01 · Key mechanics
Key mechanic: The boss recovers HP through Lifesteal on basic attacks and healing skills. It also creates Thorn Field and grants itself DMG Reflect with its skills.
Why is it dangerous? If left unchecked, healing restores the HP you worked hard to remove, dragging out the fight. Meanwhile, ongoing damage from Thorn Field and DMG Reflect wear down your team. A low-HP damage dealer that keeps attacking while reflection is active may fall before the boss does.
02 · Strategy
Keep Healing Decrease on the boss to limit healing and Lifesteal. Watch its remaining turns: once it expires, the boss may recover a large amount of HP again.
While DMG Reflect and Thorn Field are active, monitor allied HP and prepare healing and protection. Choose when to focus your heavy attacks based on both the reflection state and your damage dealers' HP.
03 · Useful skill effects
Healing Decrease debuff: The key effect for limiting both healing and Lifesteal. Check the skill's targets and duration to keep it active.
Red Crystal Island — Burn and temperature
Remove Burn to lower the boss's temperature. Below 0°C, the boss slows down.
01 · Key mechanics
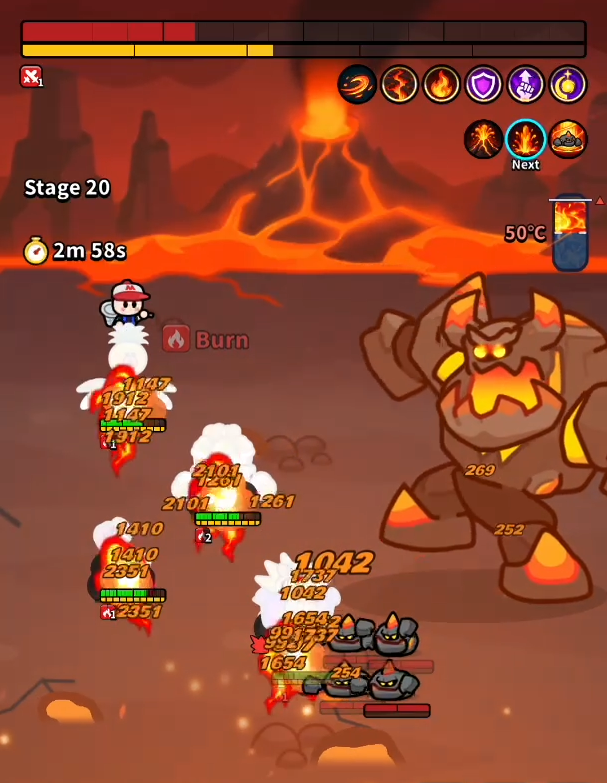
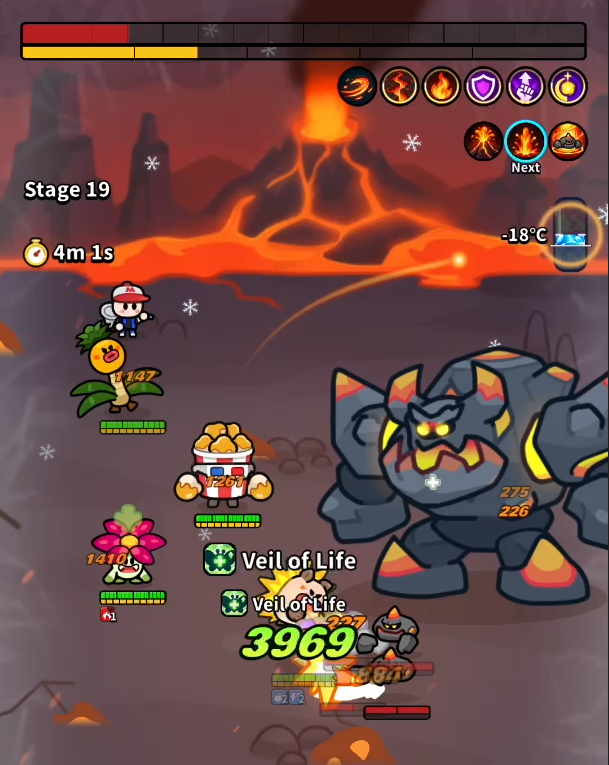
Key mechanic: If an ally has Burn, the boss's temperature rises when it uses basic attacks. Each time you actively remove Burn, the temperature drops by 10°C. Below 0°C, the boss slows down. Letting Burn expire naturally does not cause the same temperature drop. From Stage 16, Burn affects more targets.
Why is it dangerous? Higher temperatures make the boss and Cogolem faster and increase the extra damage associated with Burn. Leaving Burn unchecked not only causes ongoing damage; it speeds up enemy attacks and skills, leaving less time to heal or prepare. Burned allies may also become the boss's priority targets.
02 · Strategy
Check which allies have Burn and remove it with Debuff Remove skills. Actively removing Burn to lower the temperature is more important than waiting for it to expire. At higher stages, check skill targets and intervals so you can clear Burn from multiple allies.
03 · Useful skill effects
Debuff Remove: The key effect for removing Burn and lowering the boss's temperature. Effects that remove debuffs from multiple allies are especially useful.
Debuff Block buff: Applying Debuff Block in advance to prevent Burn is also useful.
Blue Crystal Island — removing and preventing Shields
Use Buff Remove and Buff Block to remove Shields or prevent new ones.
01 · Key mechanics
Key mechanic: While Shielded, the boss takes 70% less damage and fires extra water droplets with its basic attacks. Summoned Lumid also attack more strongly while the boss has a Shield.
Why is it dangerous? Attacking through the Shield makes the boss harder to defeat while exposing multiple allies to additional attacks. Lumid can also reduce allied Skill Energy.
The difference: Buff Remove clears an existing Shield; Buff Block prevents a new Shield from forming.
02 · Strategy
If a Shield is already active, remove it with Buff Remove, then use Buff Block to prevent it from returning and keep your attack window open. Buff Block alone does not remove an existing Shield. Check Accuracy so you can apply these effects reliably.
03 · Useful skill effects
Buff Remove and Buff Steal: Removing or stealing the boss's current Shield is essential against this boss.
Buff Block: Prevents Shields from forming again. These effects have different jobs, so check each skill's description carefully.
Purple Crystal Island — stopping Charge with debuffs
Keep debuffs active to prevent the boss from charging and reduce its HP. Disabling debuffs do not work.
01 · Key mechanics
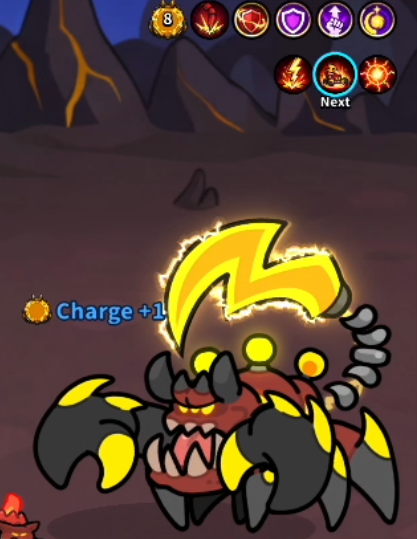
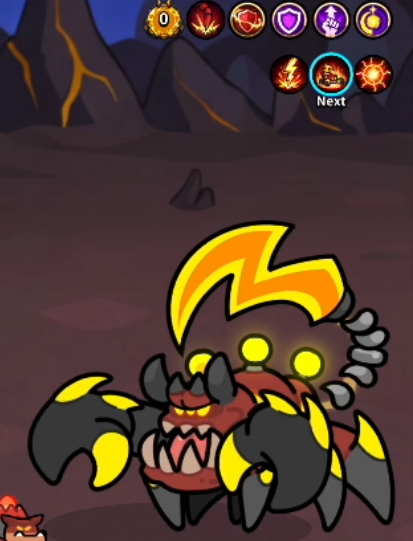
Key mechanic: The boss gains Charge when it makes a basic attack without any debuffs. Applying a new debuff removes 1 Charge and makes it lose HP. From Stage 7, it removes 1 of its own debuffs each time it uses an active skill.
Why is it dangerous? More Charge increases the Stun chance of basic attacks and Discharge. Discharge ignores Shields and deals extra damage based on allies' max HP, scaled by Charge. If debuffs lapse, heavy area damage and Stun can arrive together, preventing healing and counterattacks. Without debuffs, Voltio also gains Attack and can fill the boss's Skill Energy.
Caution: Debuffs that prevent actions, such as Stun, do not work on this boss. Use other applicable debuffs to suppress Charge.
02 · Strategy
Keep applicable debuffs on the boss to prevent Charge, and apply new ones to reduce existing Charge. From Stage 7, the boss removes 1 debuff after each active skill, so check for gaps and reapply as needed.
Debuff Voltio too, or take it out with area attacks. Rather than trying to stop Discharge with Stun, reduce Charge before it happens to lower both damage and the risk of Stun.
03 · Useful skill effects
Debuffs: Suppress Charge, and newly applied debuffs also remove existing Charge and cause HP loss. Most debuffs are effective, but some, such as Stun and Blind, do not work.
Debuff duration increase: Extends debuffs that are already active.
Canyon of Wind — interrupt Storm Inhale
Focus damage during Storm Inhale to stop the beam. Poison can help too.
01 · Key mechanics
Key mechanic: Deplete the gauge that appears during Storm Inhale by dealing damage to cancel Storm Beam. The first inhale requires damage equal to 15% of the boss's max HP; the threshold rises by 5% with each subsequent inhale.
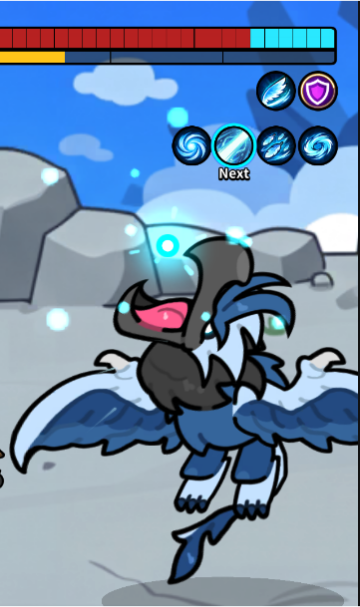
Why is it dangerous? If you fail to interrupt the inhale, Storm Beam deals heavy damage to all allies based on their max HP and also Stuns them. It ignores Defense, so raising Defense alone is not enough. Both its damage and the damage needed to stop it increase with repeated uses. If the inhale starts just after you spend all your skills, you may lack the attacks needed to break the gauge.
02 · Strategy
Time your attack skills so you can concentrate the required damage during the inhale. Each repetition raises the damage needed, so do not assume the same attacks will always stop it. Poison ignores high Defense, but combine it with other attacks because the boss has Poison damage reduction.
As the boss prepares to inhale, allied skill gauges are all set to 50%. Set your MonMon's Speed with the desired skill order in mind. For example, applying Defense Decrease before your damage dealer uses a skill deals much more damage than doing it in reverse. Think about the order in which your team should use its skills.
03 · Useful skill effects
Poison: Bosses have a separate Poison damage reduction effect, but Poison remains effective against the Canyon of Wind boss. Enough Poison can help cancel the inhale.
Attack Up buff: Helps break the Storm Gauge. Check both timing and cooldowns.
Defense Decrease and increased damage taken debuffs: Maximize the damage you deal to the enemy.
If you cannot stop the inhale, surviving it is another option. Use Shield buffs to strengthen your team's defenses.
Undead Castle — rescue allies from Nightmare
Wake trapped MonMon through healing, and protect your healers from being defeated.
01 · Key mechanics
Key mechanic: Allies trapped in Nightmare cannot use basic attacks or skills and must receive enough healing to wake up. The healing required varies by stage; Shields do not count as healing.
Why is it dangerous? Trapped allies keep taking damage and leave the battle if not rescued within a time limit equivalent to 3 turns. The boss also takes 90% less damage while an ally is trapped, so simply attacking it will not solve the problem. Nightmare Burst can deal more damage to the MonMon that healed the trapped ally the most, making healer survival crucial.
The danger after an ally falls: A grave appears when an ally is defeated, and a Ghoulpet rises after 1 boss turn. Ghoulpet can attack trapped allies and apply Healing Decrease. Summons and the number remaining alive also strengthen the boss, making the next rescue harder.
02 · Strategy
Prioritize healing trapped allies to rescue them before time runs out. Bring enough healers to free them from Nightmare. A rescue lets the ally act again and can remove the condition granting the boss damage reduction.
Restore and protect the MonMon that healed the trapped ally the most in preparation for Nightmare Burst. If an ally falls, revive it before 1 boss turn passes to prevent a Ghoulpet from spawning.
03 · Useful skill effects
Healing: The key to waking allies from Nightmare. Shields cannot replace it.
Revive: Bring a fallen ally back before 1 boss turn passes to prevent a Ghoulpet from spawning.
Ally protection effects: Help healers survive the boss's follow-up attacks.
Ice Fortress — break the Ice Shield with repeated hits
Break the Ice Shield with multiple hits, then focus attacks while the boss is exhausted.
01 · Key mechanics
Key mechanic: The Ice Shield breaks based on the number of hits, not the damage dealt. While it remains, the boss takes 80% less damage and blocks harmful effects (debuffs).

Why is it dangerous? Single heavy hits cannot break the Shield quickly. If you take the boss's skill while it remains, you receive extra damage and Max HP Decrease based on its remaining count, while the boss heals itself. Lower max HP reduces how much health you can recover for later attacks.
Attack window: Breaking the Shield removes the boss's Skill Energy and exhausts it. While exhausted, its gauge fills at a fixed rate regardless of Speed. Once full, it recovers and immediately uses a skill, so make the most of this window.
02 · Strategy
Use multi-hit attacks to break the Shield first, then focus damage during exhaustion. Taking the boss's skill while many Shield hits remain can expose you to extra damage and Max HP Decrease. During exhaustion, watch the gauge itself rather than estimating your attack window from the boss's Speed.
You can deal more damage after it breaks.
03 · Useful skill effects
Multi-hit attacks: The main way to quickly reduce the Shield's remaining count. Bring MonMon with active skills that hit 5–10 times or more.
Speed Up and Skill Energy Increase: Speed Up helps MonMon attack and use skills more quickly. Skill Energy Increase also helps bring the next skill sooner.
Enemy Skill Energy Decrease: Once its Shield breaks, the ice boss is no longer immune to Skill Energy Decrease. Reduce its energy to delay the Shield's return.
Insect Queen's Hive — clear Beebee first
Defeat Beebee with area attacks before the boss collects them to heal and power up.
01 · Key mechanics
Key mechanic: Beebee summoned by the queen arrive in Stealth, making them difficult to target with single-target attacks. Each Beebee defeated also damages the boss, and the more Beebee remain, the less damage the boss takes.
Why is it dangerous? Leaving Beebee alive makes the boss harder to damage, and some area attacks grow stronger with their numbers. During Legion's Wrath, Beebee attack alongside the boss, which then collects the survivors to heal and permanently increase its Attack. Delaying their removal creates a cycle of healing and growing strength.
Caution: Healing Decrease does not work on the boss. To prevent healing, defeat Beebee before they are collected.
02 · Strategy
Clear Beebee with area attacks, or remove Stealth before attacking. Defeat them before the boss collects them to prevent healing and permanent Attack increases. Focus on defeating Beebee in time rather than trying to stop the boss's healing with Healing Decrease.
03 · Useful skill effects
Area attacks: Hit and clear Beebee even while they are in Stealth.
Buff Remove: Beebee frequently receive Stealth and Attack Up buffs. Remove these effects with Buff Remove.
Healing Decrease and Poison do not work on the boss, so do not choose them as your main counters.
Goblin Territory — combine buffs and debuffs
Buff allies to reduce damage taken, and debuff the boss to increase damage dealt.
01 · Key mechanics
Key mechanic: More buffs on an ally reduce the damage it takes from the boss, while more debuffs on the boss increase the damage it takes from direct attacks. Stackable effects such as Poison count once per stack. A MonMon that defeats a Gobling gains Skill Energy.
Why is it dangerous? Each defeated Gobling increases both the boss's damage dealt and damage taken. Clearing Gobling creates a chance to hit the boss hard, but its retaliation also becomes stronger. If left alive, Gobling gain Speed as they make basic attacks.
02 · Strategy
Prepare allied buffs and HP, and stack debuffs on the boss before clearing Gobling. After taking them out with area attacks, focus damage on the boss while its damage taken is increased.
The MonMon that defeats Gobling can use the Skill Energy gained to reach its next skill sooner. The boss's attacks also become stronger, so watch your remaining buff/debuff turns and allied HP as you finish the fight.
03 · Useful skill effects
Ally buffs: Reduce damage taken from the boss.
Area damage attacks: Hit Gobling along with the boss.
Debuffs on the boss: Increase the damage of direct attacks.
Lordrake — build a balanced team
01 · Key mechanics
Key mechanic: Lordrake gains Power of Dragon whenever it uses an active skill, making its attacks stronger. Poison cannot be removed, but damage per instance is capped. Speed Decrease and Skill Energy Decrease do not work on the boss.
Why is it dangerous? As the battle continues, area attacks deal more damage, making it harder to survive with the same healing and protection. Tyrant's Smash targets the ally with the lowest HP percentage and applies an unresistable Stun, making it difficult for weakened MonMon to keep acting.
Late-battle danger: With enough Power of Dragon, the boss ignores DMG Block and Unkillable and applies Revive Block to allies it defeats. Relying only on delaying its skills or repeatedly reviving may leave you without a response later on. Build up damage from the start while managing allied HP.
Abyssal Breath
Damages all allies and applies Poison.
Earth Tremor
Damages all allies four times in succession.
Tyrant's Smash
Attacks the ally with the lowest current HP percentage and applies an unresistable Stun.
02 · Strategy
Team balance is vital against Lordrake. Try to include at least one MonMon for each of the following roles.
- Strengthen allies with buffs or support their Skill Energy
- Weaken Lordrake with debuffs
- Protect allies with Shields, Healing, Revive, or similar effects
- Deal damage to the boss
Poison is a particularly powerful way to deal sustained heavy damage to Lordrake.
Balance offense and survival so your damage dealers can keep dealing enough damage.
03 · Useful skill effects
Effects that improve damage output: Maximize damage with Attack Up, Defense Decrease, and effects that increase damage taken.
Effects that protect allies: Shields, Defense Up, reduced damage taken, and Ally Protection help your team survive longer.
Speed Up and Skill Energy Increase: Help you use skills more quickly.
Healing and Revive: Essential for enduring the boss's powerful attacks.
Poison: An effective way to damage Lordrake's large HP pool.
Do not rely on Speed Decrease or Skill Energy Decrease against the boss, or Resistance to stop Tyrant's Smash. Keep the late-battle limits on DMG Block, Unkillable, and Revive in mind as well.
See the update announcement for combat system and MonMon skill changes, data resets and retention, and quality-of-life improvements.